Configure POP or IMAP Email Account with Mozilla Thunderbird
Thunderbird is free desktop-based email client which is developed by Mozilla Foundation. It provides configuration with other accounts like Gmail, Outlook, etc. using either POP or IMAP server. So here I am going to describe the step by step process to know how to configure POP or IMAP email account with Mozilla Thunderbird.
To manually set up your Email with Thunderbird
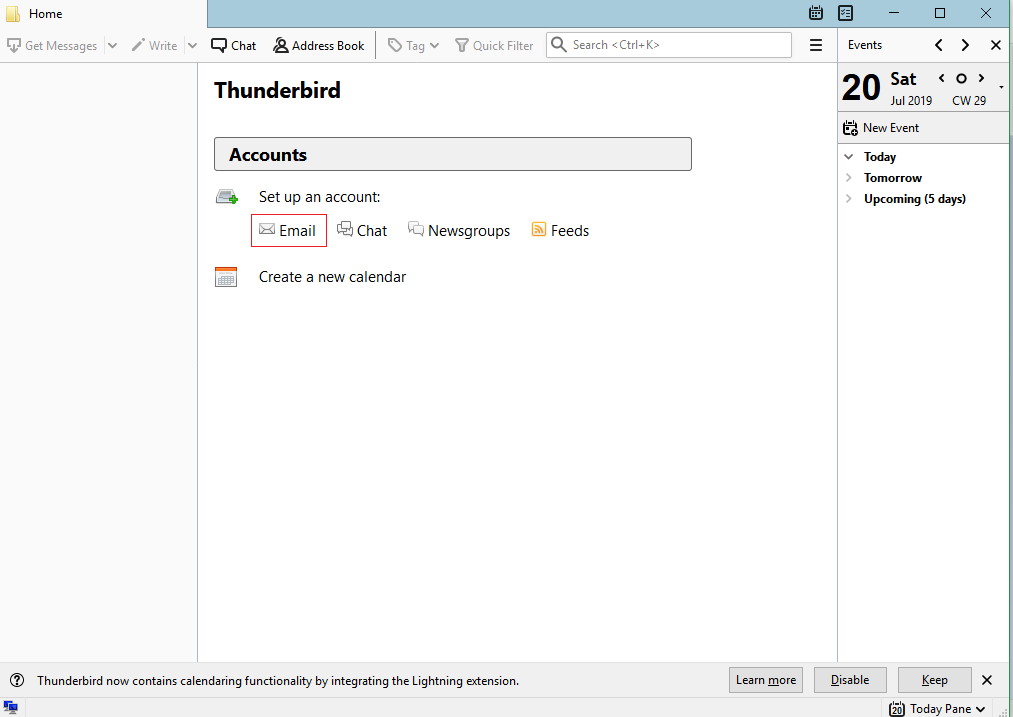
For configuring the Email account on Mozilla Thunderbird you need to install and launch it on your PC. After opening the TB, you will see a window come on the screen. From here you can easily add the account.
Step 1: On the open window you will see Email under the Set up an account option. Click on it.

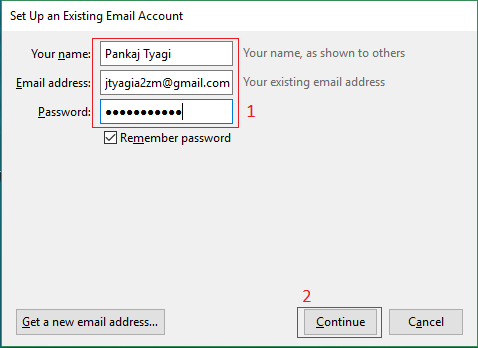
Step 2: After that, you will see a pop up on the screen where you need to type Existing Email details with the Name, Email ID and Password>> Continue.

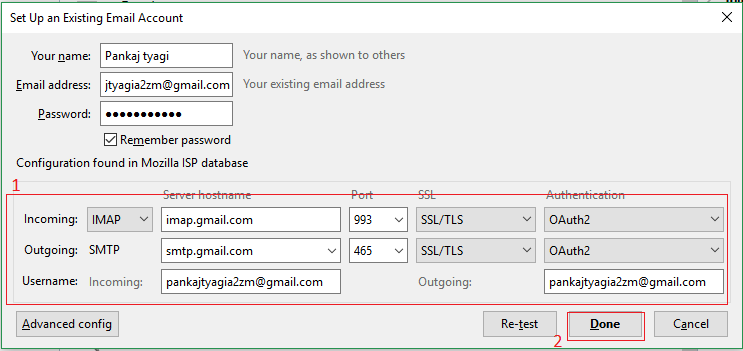
Step 3: Once you hit on continue you will get two options (POP and IMAP), you can select any one of them and then click Done.
Note: You can also configure the incoming or outlook server manually by clicking on the manual config option.

With the manual configuration, you need to require the incoming or outgoing server and the port number.
For example
The Gmail account detail,
Incoming server: imap.gmail.com / pop.gmail.com
Port number: 993
Outgoing Server: smtp.gmail.com
Port Number: 465
Step 4: After hitting on Done it will and to log in your Gmail account. So just type the ID and Password and click Allow to access your mailbox.
Note: With the same step by step process you can add or configure multiple POP or IMAP Email Account. Once you successfully configured the email you can add the contacts, tasks, and also create the Events.
Conclusion: In this post, I tried to give the information about the Mozilla Thunderbird email client and also explain how we can configure POP or IMAP email on Thunderbird. If you still have query then leave a message on the comment box.
